

I help business people with photography content strategies that help them be present in their real life while building meaningful connections with their audience. Here’s a checklist for how to use that.
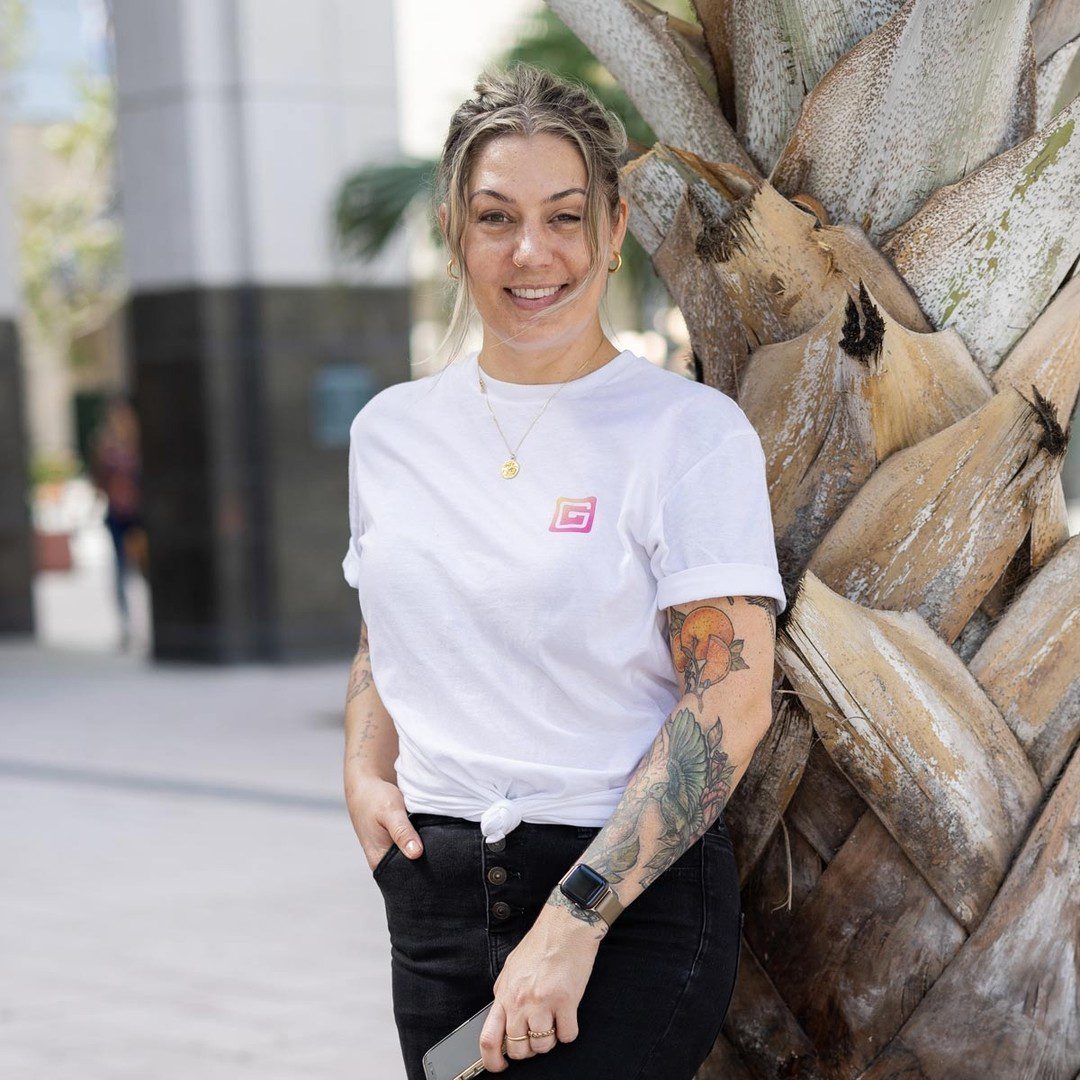
So you had a killer personal brand session and you have a bunch of image files. Now what?
There are all kinds of checklists online for how to plan a session, but I didn’t find anything about what to do after one.
This is that checklist.
- Brand your digital self
Choose one image to be your profile photo and change your avatar in the following spaces:
Instagram
Facebook
Linkedin
Twitter
Slack
Gmail
iCloud
WhatsApp
Marco Polo
Pinterest
TikTok
Payment apps you use for business (like PayPal)
Bonus points for using your images to create timeline covers for your profiles. You can use Canva, Spark or any number of apps to create these banners.
It’s my personal opinion that your profile photo should be one in which you’re making eye contact with your viewer. Remember, you’re using these photos to establish rapport and that means they need to help them know, like, and trust you. Eye contact is important here.
Like me, you may have two different branches of all the above platforms: one for personal, one for business. You can keep your personal stuff personal and have different images to represent yourself. But anywhere you interact as your personal brand to talk to customers should be aligned with your personal brand image.
- Brand your comms
There is so much digital real estate in your portfolio of customer touchpoints. One of these which is often overlooked is email. You communicate with your customers via email multiple times in an engagement. They talk to you via email more than any other avenue but it is so often overlooked as an opportunity to brand yourself.
Create an eye-catching email signature with Wise Stamp. Select a template with a photo and make sure it’s one where you’re making eye contact with your customer. See my own email signature here.
- Brand all touchpoints
In addition to the suggestions above, other digital touchpoints are slide decks and pitches, invoicing, and payment portals.
Depending on your industry, you may also have physical touchpoints in the form of leave-behinds, business cards, and cover letters.
Here is an example where I used a client’s personal brand photos when designing his capabilities deck:
As a designer, I often help clients create these pieces of marketing collateral so let me know if I can do this for you! - Your website
Of course, you have a website, right? I hope so! Work with your designer to help you elevate your website using your new images. This may lead to a whole rebrand of color palettes, typography, and even language and tone. I have found that my own personal brand sessions have always spawned a period of creation where I felt inspired to elevate my brand to the next level.
If you don’t have someone to do this with you, talk to me. I’m not just a photographer. I create web experiences like this one you’re on right now and I take all the smoke and mirrors out of the process. In fact, I created this new website in about 48 hours. From scratch.
The biggest time-suck when creating a website is the images and the copy. You’ve got your images taken care of, now. The thing that makes a difference in how fast you can launch a new website is copywriting.
- Your social channels
You should have enough photos from your session for many many posts to your social media feeds. There are two ways you can approach filling up your social calendar:
Copy-first: The copy-first approach would see you writing all the captions you want to share with your audience and then choosing images that can work with those posts.
Photo-first: This would be selecting images you want to put on your social calendar and then figuring out what to write to go with them.
I prefer the copy-first approach. The image is for attention and the copy brings the learning, the value and the real meat of this content for your audience.
How can you come up with what to write for these posts? First, think of content “buckets” for what you want to talk about on a regular basis. Buckets might be things like:
Business. Naturally, you want to talk about the value you bring through your business. Write lots of little tidbit size posts about what you do for customers, how it brings value to them. You can share customer quotes, reviews, and stories.
Personal. During your personal brand session, we may have taken photos for you to share your hobbies and personal interests. Think of things you can write about the value these things bring to your life and how they help you be great at what you do. We may have taken photos so you can share about your family, pets or your journey to where you are today.
Don’t be afraid to talk about the same things over and over. That’s what marketing is. Saying the same things over and over in different ways. Your audience will only see a very small portion of the things you share, so there’s a very good chance they won’t have seen the first couple of times you talked about your business. And if they have, they either won’t remember it or just appreciate hearing it again.
I use Later for scheduling my social media posts so I can sit just once a month and then let the robots take over so I can connect with my audience while being present in my real life.
Our session together
If you’ve seen the sessions I offer and are torn about which one to go for, this might help:
Lite is a 2 hour session. The goal is to hit 3 storylines/wardrobe changes. You’ll end up with 50-100 images. This is great if you don’t even have basic headshots or any recent imagery of what you look like now to get going with your business.
Full is a 4 hour session. It’s basically double everything we can achieve in a lite session. Once we get going, we work faster and achieve more in shorter time so I’d say it’s maybe even more than double. We speed up as we go and some clients have received as many as 300 final images from a 4 hour shoot. This can be achieved when we have a location with many different places to shoot (like a resort) and many outfit options.
I look forward to learning about your business and helping you achieve all the photos you need to do everything listed in this blog post. Speak soon!